Pages

Thursday, April 9, 2015

Sister In Love's Bridal Shower


This was honestly one of my favorite days ever! Months of planning, had all come down to one day, and I could not wait to see everything all put together. We had a team of people work for hours the night before to get as much set up as possible, that way the morning of we could focus on the finishing touches and preparing the food.


The chair that this chalkboard is sitting on, my brother used during the proposal, so I knew I wanted it to be at the shower. Fun little fact is that instead of writing with chalk or a chalkboard marker, this is actually black poster board and I used a white paint pen to make it look like a chalkboard!


With the invitation we included 2 recipe cards, and asked the guests to return them to be entered to win a raffle. We also had a guest book that was a ceramic platter that we had each guest sign, then you can bake it to keep the signatures on the platter. Such a cute reminder of a very special day!


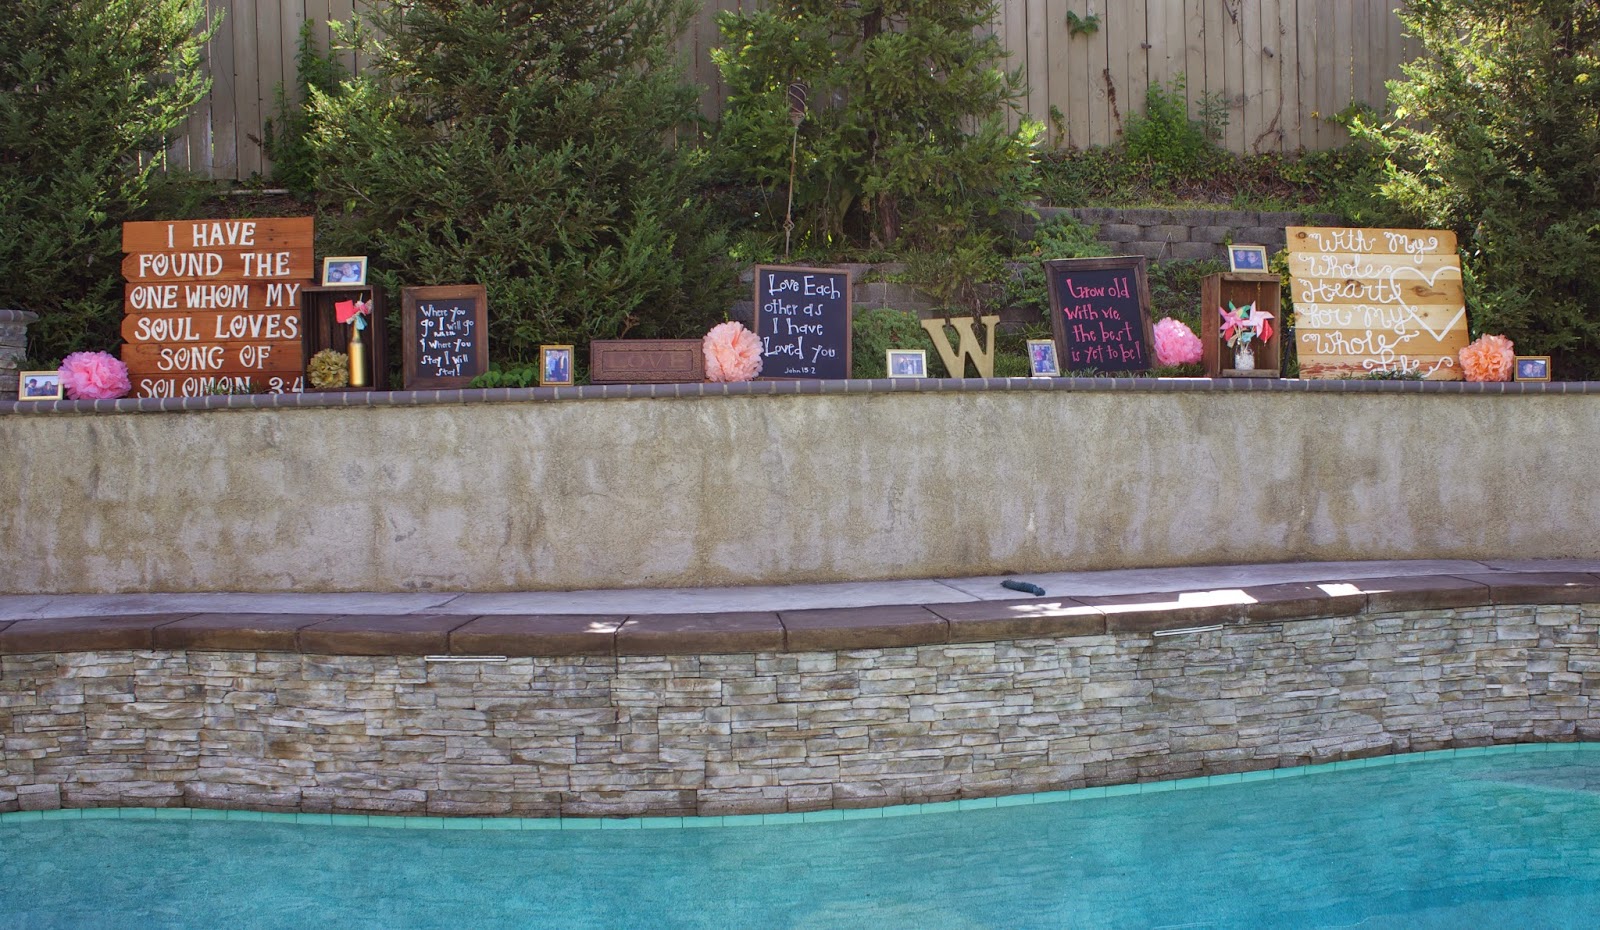
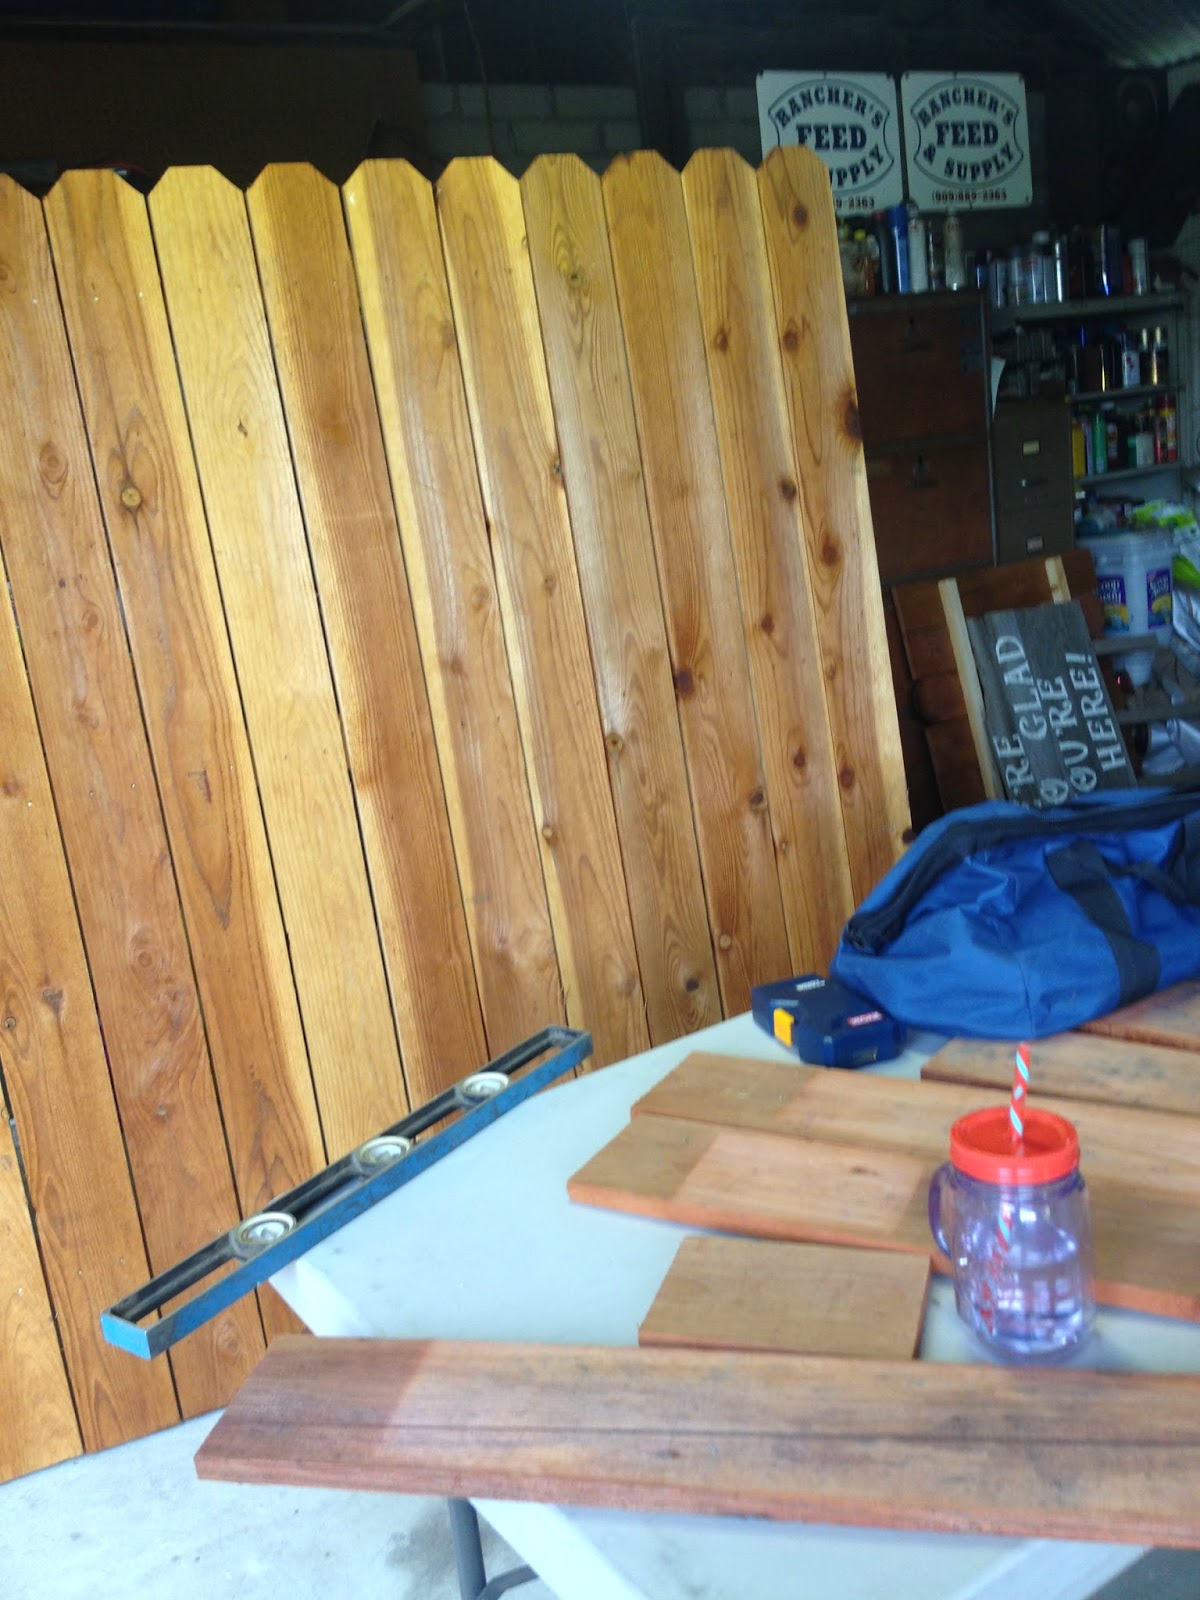
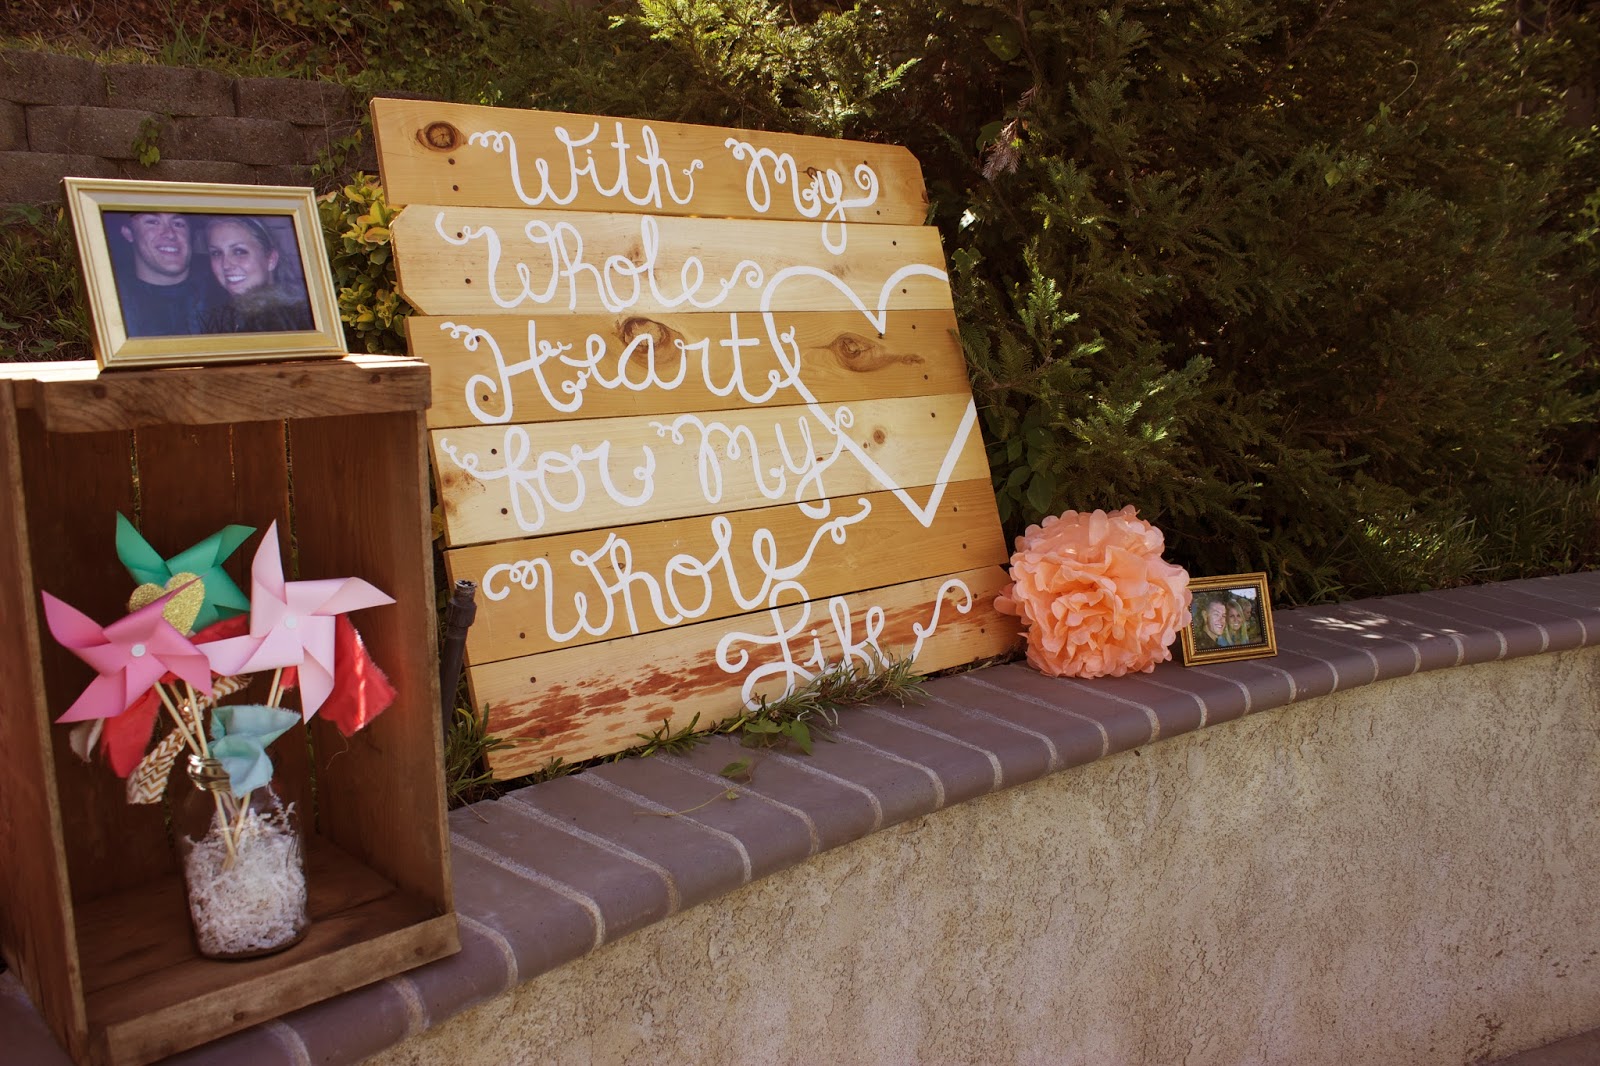
Here are the pallet signs from the wooden signs post that I hand painted.


 My sister in love's parents went down to the LA Flower Mart the day before the shower, to get these gorgeous flowers. They set a budget of how much they were going to spend and got as much as they could for that price. A group of us put these arrangements together the morning of the shower. I absolutely love how gorgeous they turned out. The picked out so many great flowers! 


We put the flowers in various jars, and mason jars that we had collected. We put flower arrangements on each table all throughout the shower. 

Here is the food table. And you will recognize the pictures of the food table from the coffee filter post. This was truly one of my favorite parts of the shower! 


Here is the drink table. We had mason jars and cute paper straws for each guest. 
We tied twine around the tops of each jar and attached a gold glitter paper heart, so that the guests could write their names on the back, to keep track of their cup! 

 Here was the dessert table before the desserts went on.

 Here is the dessert table full of the goodies, cupcakes, sugar cookies, and strawberry tarts.
 We had mason jar sugar cookies made for the shower. They said J+L having a Ball.

And we also had a Mimosa Bar because we had the bridal shower around brunch time! 


Thank you for stopping by to take a tour of the Bridal Shower. What a blessing and honor it was be able to shower someone that is so special to you with so much love! I could not have hand picked someone better to spend forever with my brother and loved every second of this day and wish that I could re-do it over and over!

Thursday, February 19, 2015

Backdrop Wall

I had seen this picture on Pinterest and knew that I wanted to make something like it.


 I feel like one of the worst things at a bridal shower, baby shower, or even a birthday party is all of the pictures of the guest of honor opening all of their gifts there is so often the worst most ugly backgrounds behind them. I wanted to make sure that this didn't happen, hence the reason I just HAD to make a backdrop wall.


I went to Home Depot purchased a pre-assembled fence piece, and then bought boards that matched to make the shelves.


I wanted the shelves to be all different sizes similar to the picture, so my Dad and I cut the shelves out of large pieces of board, to be all different lengths.

My Dad and Grandpa bent some pieces of metal that they had to use as brackets for each of the shelves.

 And here is the fence backdrop all complete at the shower. My amazing sister added the tissue paper pom-poms to the wall, to add a pop of color and I absolutely love how it turned out! The green velvet chair belonged to my Great-Grandmother and was in my Grandparents house when I was little. This is where my soon to be sister sat while opening her gifts! You will remember the giant J & L from the GOLD post. This was also one of my most favorite parts of the shower, it was such a focal point and was just gorgeous! 

That completes all of the DIY project posts for the shower. Check back to see a tour of the entire Bridal Shower and all the little details! 

XOXO, Whitney

Monday, January 26, 2015

DIY Cake Stands

For the shower I knew that I wanted to add some height to the centerpieces and I thought that cake stands would be a perfect way to do that. I am someone who likes things to all be a little different so I knew I wanted to come up with a way to make the cake stands all a little different. 
I picked up different plates, glass goblet type cups, and a few candle sticks, at a few different yard sales, and also a local thrift store. 

Here is the variety of different plates and bases that I found! 

Using this glue that I found at Home Depot I glued the plates to the bases (the glasses or candle sticks) The glue's directions said to let it set for 30 minutes, but cure for 24 hours, so I did that to make sure that the glue was good and dry.


 I let them dry just like this for the full 24 hours, making sure to check them after about an hour to double check that everything was straight and hadn't slipped around. 
I picked up this super pretty metallic spray paint in "Pearl Mist" to spray some of my cake plates and the rest of them I painted, I'm sure you guessed it, GOLD.


 Here is a picture of one of the tables before the flowers went on, with a gold cake stand in the middle.

Here is a picture of the cake stand with the flowers setting on it! 

Only ONE more DIY project to go and I will show you around the entire shower all put together!

XOXO, Whitney


Monday, January 12, 2015

GOLD.

It is no secret that I love anything that is sparkly especially if it is GOLD. I knew that I wanted to add in pops of gold throughout the Bridal Shower, because who doesn't love themselves a little or ok a lot of gold!

I bought some gold spray paint and my first project with it was spray painting some glass bottles gold. I took beer bottles, wine bottles, other glass drink bottles, and jars and I cleaned and scrubbed the labels off of them.

 After all the labels and sticky residue was cleaned off I wiped down each bottle with lacquer thinner to remove any of the oils. 
 This is the gold spray paint that I used and I purchased it at Home Depot. I absolutely loved it and wanted to paint everything with it! :)


 I LOVE how the bottles and jars turned out! The looked so good! 


 Here is a group of them all finished!


The next thing that I painted gold was these picture frames that I bought at the $1 store. I dusted them off well and then used Tack Cloth (that you can buy at Home Depot or Lowes) to make sure to get off any extra dust and oil and gets the surface ready to paint. 


Here is how the frames turned out! 

 I bought these giant letters from Joann's Fabrics, they are made out of cardboard and I also spray painted them gold. I will show you what I used them for in a future post! 


Check out my next post this week to see how I made cake stands, out of old plates, cups, and candle sticks. 
 Until next time! XOXO, Whitney

Thursday, January 8, 2015

Coffee Filter Project

I had seen this idea on the 31 Bits Blog and knew that I just had to make them for the shower. Also, please check out 31 Bits and you can see their adorable DIY ideas, but also read about all the incredible things they are doing and all the lives they are empowering and changing through the sales of their gorgeous jewelry!

For this project all you need is:
A package of coffee filters (I bought 2 large packages from Smart and Final)
Food Coloring
Rubber Gloves
A bin or container (To put the water/ food coloring mixture in)
A spray bottle (To mix the color mixture in)
A clothes line (To hang the filters to dry)

 I bought 2 large packages of coffee filters. I made one whole package in mint green, and made the second package in a pink/coral color. To start out you need to mix up your desired color with food coloring and water. I mixed mine in the spray bottle you see in the picture and then poured it in to a dish pan. I then dipped stacks of about 10 coffee filters in the water/ food coloring mixture at a time and then hung them up on the clothes line to dry.
 Here are some of the mint green ones hanging to dry.


 Here are the coral/pink ones hanging on the line to dry.


  Once they were dry I took them down and put them in a large trash bag, until the day before the shower when I was ready to string them on fishing line.

I hung the coffee filter garland above the food table and it truly was one of my favorite parts of the shower. With the help of so many people we crumpled the coffee filters, and then strung them onto fishing line using a large needle. This was the food table before the food went on.

Here is the food table, with the coffee filter garland, after the food was all set up! 
I absolutely love how this turned out! 

Make sure to check back to see the next DIY projects!

XOXO, Whitney